
MBT-11-IEL "Chaser" M10.AC-SU
by Yushiri
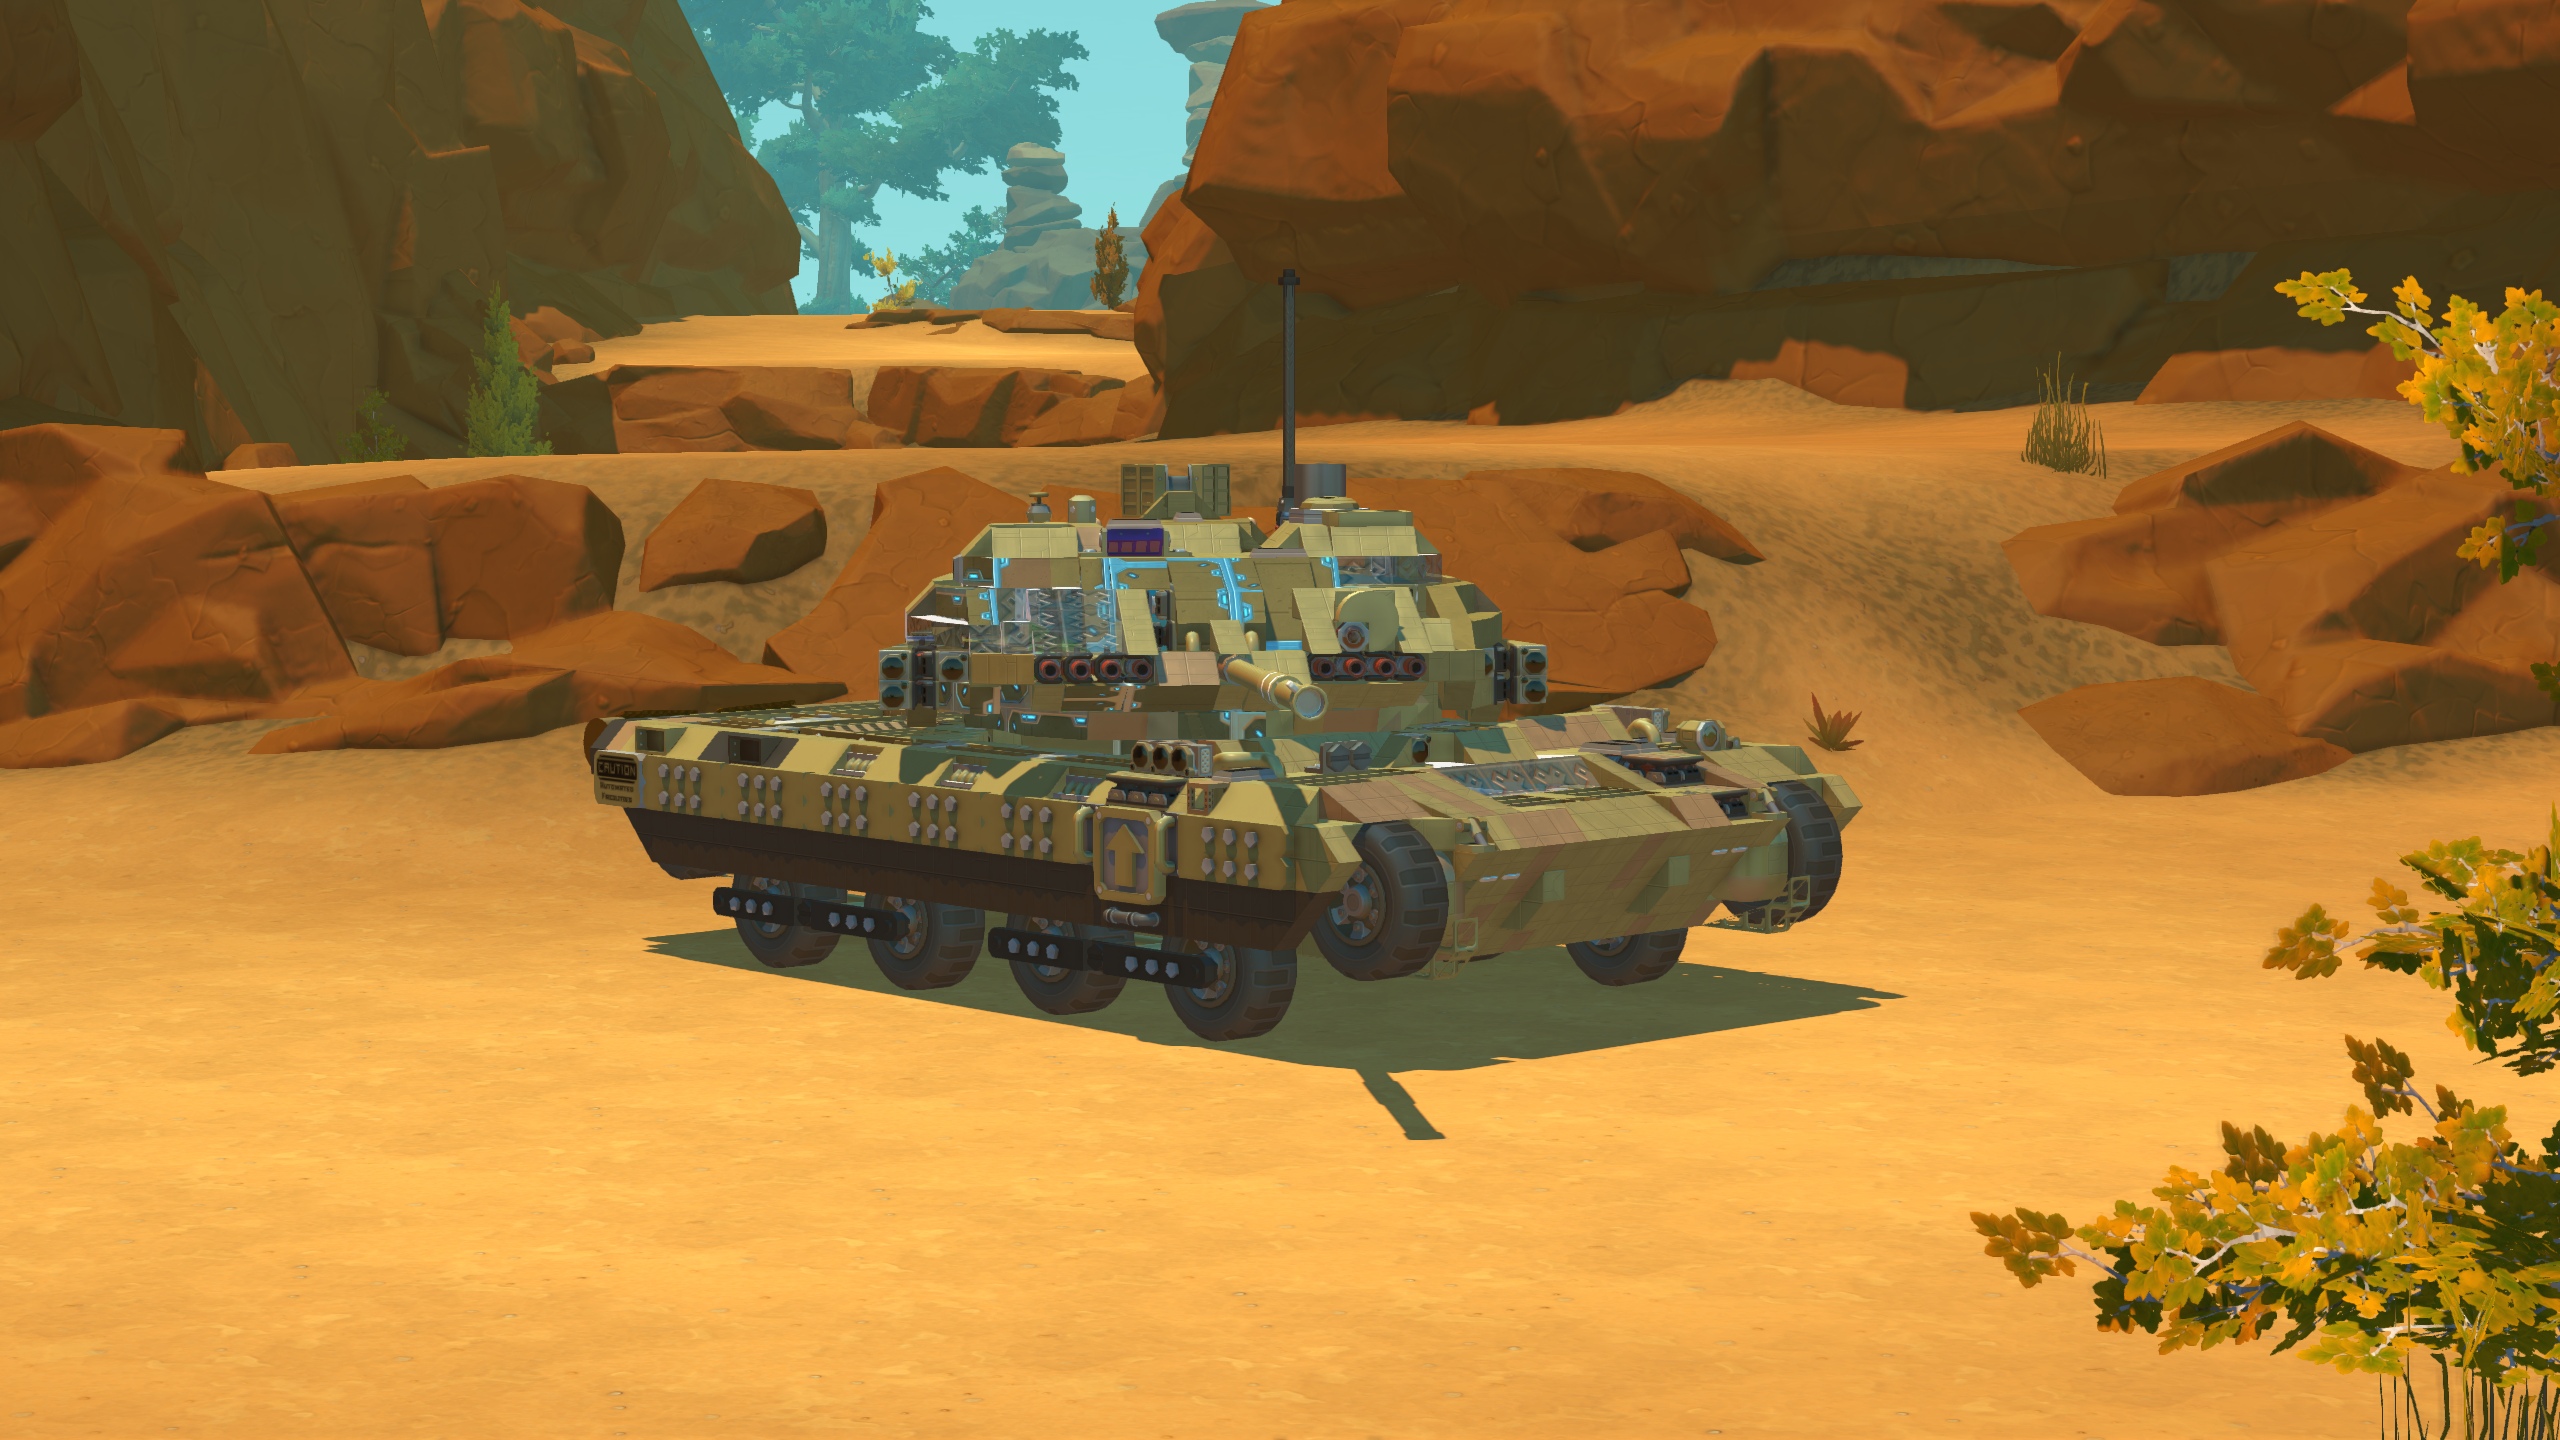
( ! ) Note: original language of description and design: Russian ( ! ) What is IEL? [hr[/hr Main Battle Tank "Chaser" M10, custom-built for battles within the International Engineering Legion. Standard configuration, matching the IEL code at the time of publication, includes: [hr[/hr [hr[/hr [hr[/hr [hr[/hr [hr[/hr 2.3.2 Automatic hull tilt to increase gun elevation angles Operating Documentation ( ! ) Important: regardless of their role, every crew member must read all the content, as the information in the sections is mixed together. When spawning the tank, the first thing to do before operation is to enter the tank through the commander-gunner's hatch and go down through the special opening located behind the commander's seat. After that, locate the black glass panel (screen) at the rear interior on the port side. Note that the indicators on the screen will only be clearly visible if the bloom effect is enabled in the settings. Check if 4 green lights are on. If all 4 lights are continuously on without flickering, everything is fine and you can proceed to direct operation. If one of the indicators is not on or flickers, you need to switch to "Advanced" physics, then reset the tank using the lift (no need to delete and spawn it anew). [hr[/hr Move on to the driver's station. It can be accessed from the outside through an opening in the center of the upper frontal glacis, or from inside the tank by passing through the commander's hatch. So, once seated, we see a variety of indicators ahead. On the left side of the steering wheel, there are 2 red lights — these are the machine gun operation indicators. The upper one is the coaxial machine gun, the lower one is the bow machine gun. Next is a green indicator; it signals that the system is loaded correctly. Right after that comes a red light next to a green indicator; it reports if the "Anti-assault" system is enabled. Warning: leaving the tank with the "Anti-assault" system running is dangerous, especially from the driver's seat. On the right side, there is a dark cyan indicator — it signals that the front scoop is lowered (if equipped). The remaining indicators on the right side of the seat are connected to the corresponding buttons and signal the operation of the adaptive suspension module. Also, directly overhead is a green indicator showing the crew's readiness to move. According to the instructions, it is not recommended to start moving unless all crew members have taken their seats. (This can be especially useful if you fail to establish voice communication with the driver). [hr[/hr The commander-gunner's station is located under the only open hatch — the main entrance to the tank. To the left are 2 breeches of the main caliber, and directly in front of the gunner are the weapon modules, aiming, and stabilization controls. Although at first glance this station looks complicated, most of the functions are situational, and their control is described above. Also, the layout of the aiming and firing control keys is IEL standardized. In the baseline state, the automation handles most of the load, but it is important to complete basic training and zeroing before sending the gunner into battle. If the automation fails, it means the tank has suffered serious damage — in this case, if possible, leave the battlefield as quickly as possible and undergo repairs. If that is not possible, here is what can be done to regain partial control: [*Disable vertical stabilization [ O ; [*Activate double shot; If one of the turret rotation keys is broken or jammed, the best thing to do is to use the controller located on the right. Its primary purpose is manual turret positioning, but in a critical situation, it can be connected and used for aiming. If the tank stops firing, try pressing the breech switch button once (the light gray button between the yellow and blue ones). If this doesn't help, in a critical situation you will have to rely solely on machine guns. If the automation is completely fine and the tank is undamaged, but shells ricochet, fail to penetrate, or overpenetrate the enemy tank, you can do 2 things to fix this: [*If a loader is present, ask them to switch from cardboard to glass or sand, provided the enemy tank does not have a lot of armor or is located very close. [*Press the yellow auto-detonation button (located under the light gray manual breech selection button described above). [hr[/hr The loader's station is located under the closed hatch on the turret. It can be accessed by removing the hatch beforehand, if necessary, or through the commander-gunner's hatch by passing under the turret. The space around the loader is a small separate corner measuring 3 by 3 blocks, with about a 180-degree field of view along the port side of the turret. For convenience, it is raised 1 block up, but if necessary, the seat can be forcibly moved one block lower. The image shows 4 indicators: 2 blue and 2 green. The green ones mean that the shell is loaded correctly and recognized by the system, while the blue one means that the gun is ready to fire. The primary role of the loader is to listen to the commander-gunner's orders and load the tank according to the recommendations from the distance table mentioned above. In their spare time, they should look through the viewport and report detected targets. ( ! ) The technical configuration limit for tension controllers starts at 570* (360+210, ~1.6 seconds) if loading cardboard. 630* (360+270, ~1.75 seconds) if glass. 825* (360x2+105, ~2.9 seconds) if sand. [hr[/hr The drone operator usually sits inside the tank under the turret or serves as a loader crew member. The moment the tank takes up a position, the drone is launched upon the commander-gunner's command. To retrieve and launch the drone, you need to climb onto the roof of the tank and break the block highlighted in red in the photo — this should be an inverted 2 by 2 cardboard corner block matching the color of the tank's hull. Afterward, using the lift, the drone is retrieved and placed on the ground. Before lowering it from the lift, you need to raise it about a meter or two up, then sit on it and press button 1. After that, the drone can be removed from the lift, sat on again, and button 2 pressed, which will automatically raise it to operating altitude, after which button 2 can be turned off. Ideally, launch the drone 5 meters away from the tank, otherwise it will cause minor damage to the tank or crew. Also, upon the commander-gunner's command, the drone can be lowered back down and returned to its place using a 2 by 2 cardboard corner and welding. [hr[/hr Versions [*MBT-11-IEL "Chaser" M10.AC-SU [*MBT-11-NS "Chaser" M10.AC-SU
Comments
0 total- No comments yet. Be first.